Español | Français | Italiano | Deutsch | Русский | Português | 简体中文 | 繁體中文 | 한국어 | 日本語
|
|
|
|
 |
Guided Assist $EN_ANSWER_50392 |
WD Drive Utilities features the ability to:
- Run drive diagnostics
- Manage RAID configuration (For RAID supported models)
- Erase and format drive
- Set drive sleep timer (on supported drives)
- Register drive
Software Download
Instructions for Windows and macOS
- About WD Drive Utilities
- Download and Install on Windows
- Download and Install on macOS
- Check Drive Health
- Erase and Format Drive
- Drive Sleep Timer
- LED Settings
- RAID Management
- $EN_ANSWER_51136
- $EN_ANSWER_51137
Need more help?
Download and Install on Windows
Follow the steps to install WD Drive Utilities for Windows.
- Download and install WD Drive Utilities.
- Click Save.

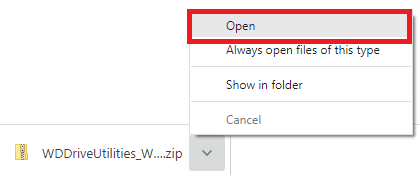
- Click Open folder.
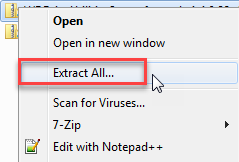
- Right-clickWDDriveUtilitiesSetup.zip.
- Select Extract All ...
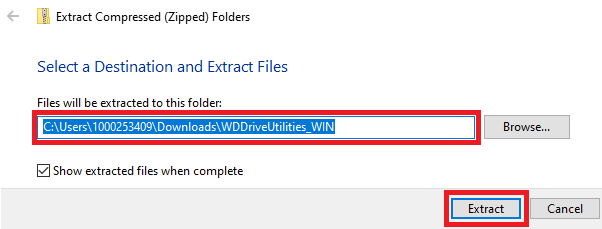
- Accept the default location.
Click Extract.
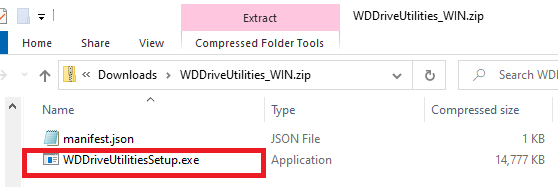
- Double-click WDDriveUtilitiesSetup.

- Read the EULA (End User License Agreement).
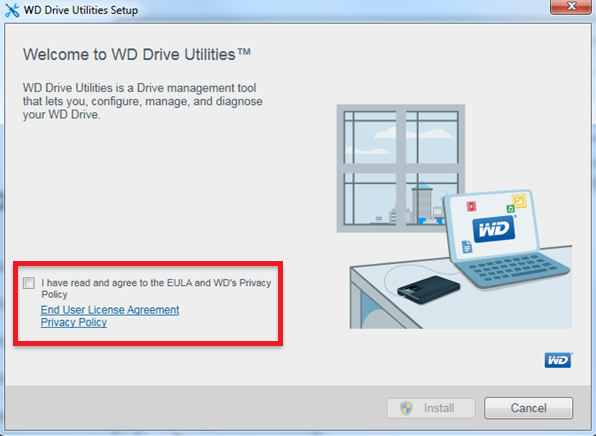
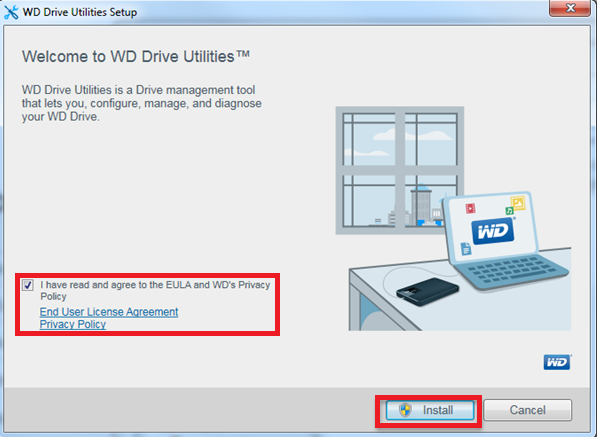
- Check the box to agree.
Click Install.
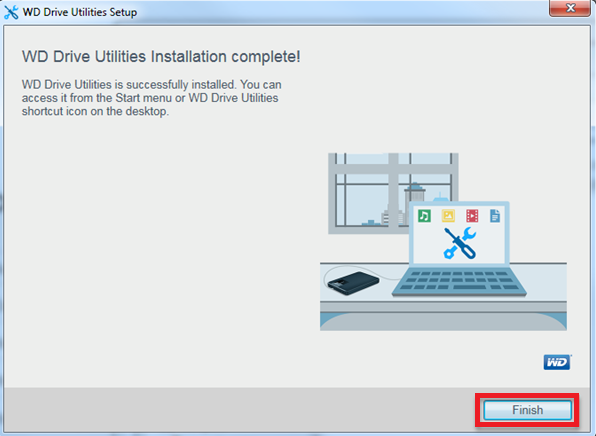
- Click
Finish .
Start WD Drive Utilities
- Connect a supported drive to the computer.
- Direct Attached Storage (DAS) Drives: My Book, My Book for Mac, My Book Duo, My Book Pro, WD Drive Plus, WD easystore Desktop, WD easystore Portable, My Passport works with USB-C, My Passport, My Passport for Mac, My Passport Ultra, My Passport Ultra for Mac, My Passport Ultra (USB-C), My Passport Ultra for Mac (USB-C),My Passport Ultra Metal, WD Elements SE, WD Backup Drive Desktop
- Drives not listed above are NOT supported.
- Attach a Supported WD Drive message.
Need more help?
Answer ID 6265: WD Security & WD Drive Utilities: Attach a Supported WD Drive
- Enter WD Drive Utilities in the search bar.
- Double-click WD Drive Utilities app.
Check Drive Health
Check the drive for errors.
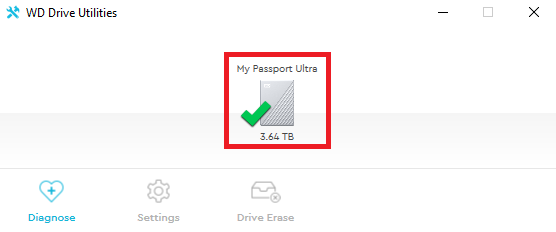
- Select a drive to test.
Click Diagnose.
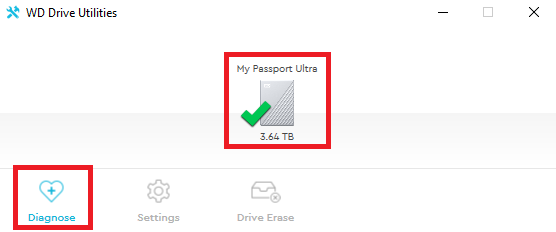
- Click a drive test type.
- Drive Status Check
The drive status check is a S.M.A.R.T. failure-prediction function that monitors key internal performance attributes of the drive. - Quick Drive Test
The quick drive test checks the drive for major performance problems. - Complete Drive Test
The complete drive test checks every sector for error conditions, and inserts bad sector markers as needed.

- Drive Status Check
Drive Test Failed
A drive that fail any test should not be used for storage.
The drive should be replaced.
Need more help?
- $EN_ANSWER_4666
- Answer ID 12163: WD S.M.A.R.T. - Self-Monitoring Analysis and Reporting Technology
- Answer ID 33498: Western Digital Warranty Replacement and Data Recovery
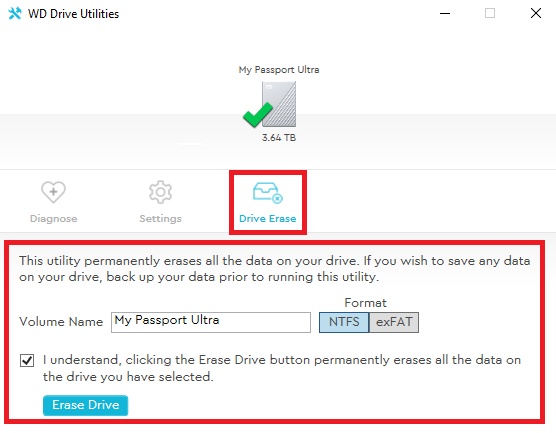
Erase and Format Drive
Erase and format the drive.
 |
Critical: The process is Data Destructive and cannot be undone. |
- Select a drive.
- Enter a Volume Name for the drive.
Select NTFS or exFAT File System Format.
Check the Box.
Click Erase Drive.
Critical:
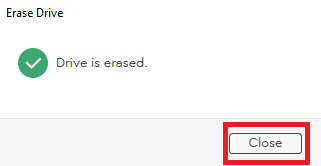
Do Not close the window until the Drive Erase is done.

- Click Close
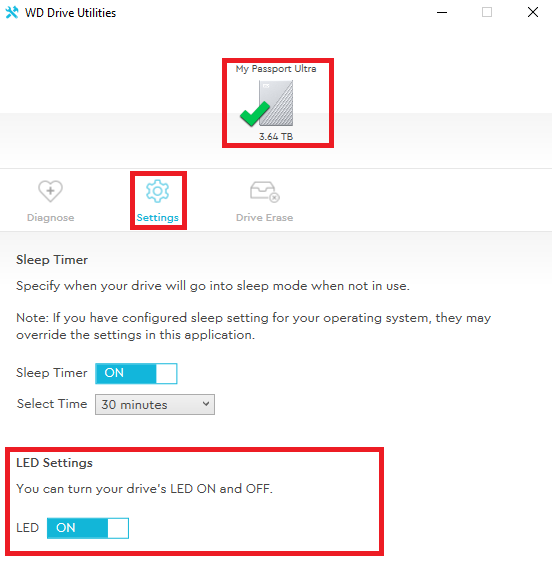
Drive Sleep Timer
The drive sleep timer turns off power to the drive after a set of amount non-use time, conserves power, and lessens long-term wear.
 |
Sleep timer does not work for for My Passport SSD, My Passport Go, My Passport Pro, My Book Thunderbolt Duo, and My Book Studio II. |
- Connect a supported drive.
- Open WD Drive Utilities.
- Select a drive.
- Click Settings.
- Click to Toggle OFF and ON Sleep Timer. (default=ON)
- Select a different time from the menu (default=30 minutes)

Timer Setting Details
| Default Timer Setting | ON |
| Default Time | 30 minutes |
| Timer Intervals | 10, 15, 30, 24 and 90 minutes |
LED Settings
Turn Off and On the LED of a supported drive. (Default=On)
- Connect a supported drive with an LED.
- Open WD Drive Utilities.
- Select a drive.
- Click Settings.
- Click to Toggle OFF and ON the drive LED.
RAID Management
IMPORTANT:The RAID screen will not who unless the drive has two drives and supports RAID.
Check the drive status and change the RAID mode.
- RAID 0 - (default) max capacity and speed, no data protection
- RAID 1 - max data protection, half capacity
- JBOD - individual drives, max capacity, no data protection
Need more help?
Answer ID 659: RAID Levels Supported with Western Digital Products
Check RAID Status
Check the current RAID mode and status of a drive.
- Open WD Drive Utilities.
- Connect a RAID model drive to the computer.
Select the drive.
Click RAID Management.
Click RAID Status

RAID Types
- Stripe or RAID 0 (Striped) - (default) max capacity, speed, no fault tolerance
- Mirror or RAID 1 (Mirrored) -
- Individual Drives or JBOD (Individual Drives) -max capacity, no data protection
RAID Status
- Healthy
- Degraded
- Failed
- Cannot Access Data
- Data Loss Detected
- Not Configured
- Offline
- Online
- Rebuild Failed
- Rebuilding (x%)
- Unknown
Drive Status
- Failed - The drive has failed
- Online - Drive is online and available
- Rebuilding - The drive is being rebuilt
- Removed - The drive has been removed
- Standby - The drive is part of the RAID array but needs to be rebuilt
- Unknown - The drive has some other undetermined status
Drive #1 and Drive #2 Status
- Drive Not Supported - The drive model is not supported
- Empty - There is no drive installed, but none was expected
- Failed - The drive has failed
- ID Mismatch - Thedrive metadata information does not match its serial number
- Insufficient Capacity - The drive installed has insufficient capacity to be part of the mirrored RAID array
- Missing - The expected drive is not installed
- New Drive - The installed drive has not been configured
- Online - The drive is healthy and part of the RAID disk array
- Rebuilding - The drive is the target disk of the rebuild operation and that operation is still in progress
|
My Book Duo Drive Status Location Regardless of Drive Label Number
|
Change Drive Configuration
Changing the RAID mode reformats both drives.
|
Critical: The process is Data Destructive and cannot be undone. |
- Select RAID Management.
- Select Configuration.
- Select a RAID mode.
- Stripe - (default) max capacity performance (RAID 0), not fault tolerance
- Mirror - max data protection (RAID 1), but half the capacity
- Individual Drives (JBOD) - max capacity, no data protection
- Enter a Volume Name(s) for the drive.
Select NTFS or exFAT File System Format.
JBOD requires two Volume Names and two Format slections.
Volumes should not have the same name. - Check the Box.
Click Configure.

Critical:
Do Not close the window until the RAID change is done.
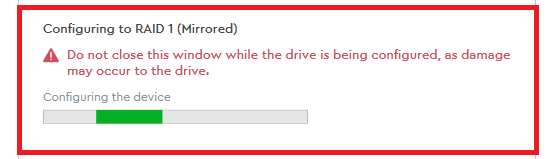
- Click Close

Download and Install on macOS
Follow the steps to install WD Drive Utilities for macOS.
- Download and install WD Drive Utilities.
- Go to Downloads folder.
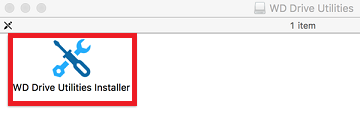
Unzip WDDriveUtilities_MACOS.zip. - Open WD_Utilities_Installer_for_Mac.dmg.
Open exec folder. - Double-click WD Drive Utilities Installer.
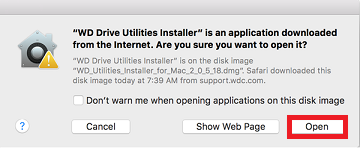
- Click Open to accept.
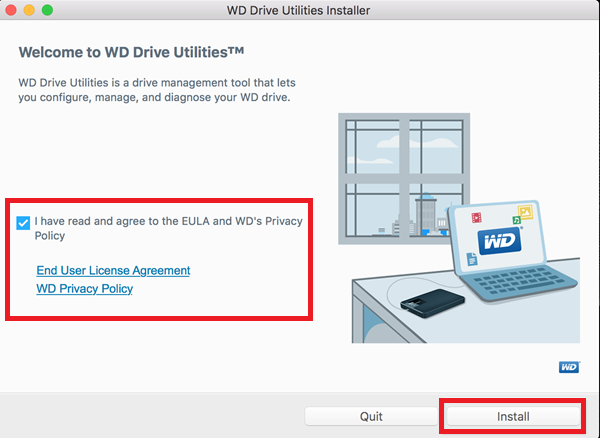
- Read the EULA (End User License Agreement).
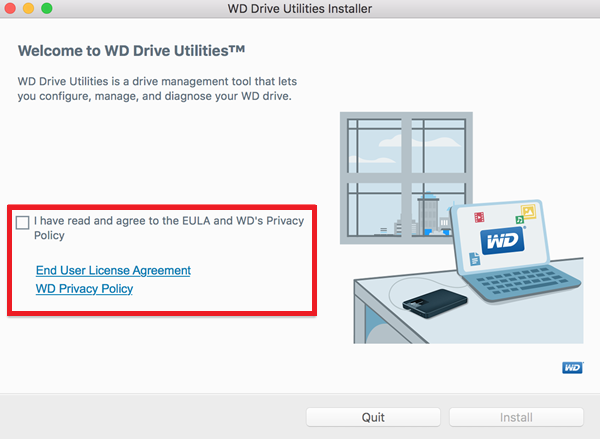
- Check the box to agree.
Click Install.
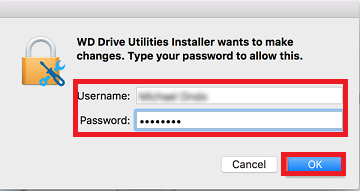
- Enter the admin user password for macOS.
Click OK.
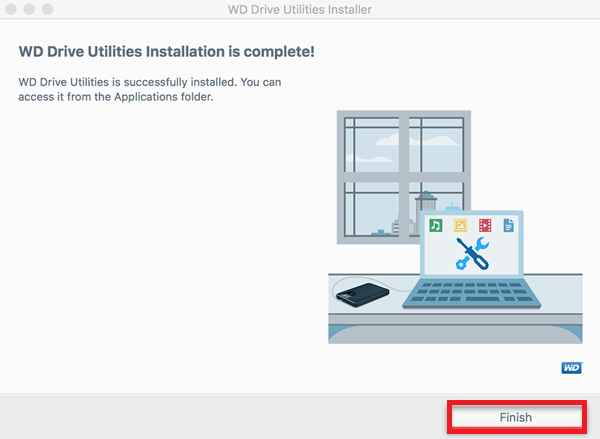
- Click Finish.
Start WD Drive Utilities
- Connect a supported drive to the computer.
- Direct Attached Storage (DAS) Drives: My Book, My Book for Mac, My Book Duo, My Book Pro, WD Drive Plus, WD easystore Desktop, WD easystore Portable, My Passport works with USB-C, My Passport, My Passport for Mac, My Passport Ultra, My Passport Ultra for Mac, My Passport Ultra (USB-C), My Passport Ultra for Mac (USB-C),My Passport Ultra Metal, WD Elements SE, WD Backup Drive Desktop
- Drives not listed above are NOT supported.
- Attach a Supported WD Drive message.
Need more help?
Answer ID 6265: WD Security & WD Drive Utilities: Attach a Supported WD Drive
- Enter WD Drive Utilities in Spotlight search bar.
- Double-click WD Drive Utilities.
Check Drive Health
Check the drive for errors.
- Select a drive to test.
Click Diagnose.
- Click a drive test type.
- Drive Status Check
The drive status check is a S.M.A.R.T. failure-prediction function that monitors key internal performance attributes of the drive. - Quick Drive Test
The quick drive test checks the drive for major performance problems. - Complete Drive Test
The complete drive test checks every sector for error conditions, and inserts bad sector markers as needed.
- Drive Status Check
Drive Errors
A drive with errors should be replaced.
Need more help?
Answer ID 33498: Western Digital Warranty Replacement and Data Recovery
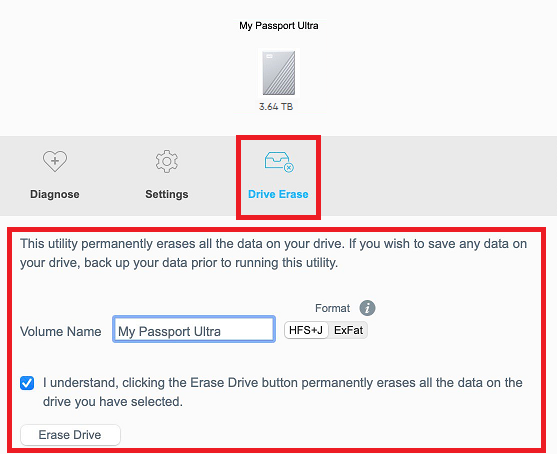
Erase and Format Drive
Erase and format the drive.
|
Critical: The process is Data Destructive and cannot be undone. |
- Select a drive.
- Enter a Volume Name for the drive.
Select HSF+ or exFAT File System Format.
Check the Box.
Click Erase Drive.
Critical:
Do Not close the window until the Drive Erase is done.
- Click Close
Drive Sleep Timer
The drive sleep timer turns off power to the drive after a set of amount non-use time, conserves power, and lessens long-term wear.
|
Sleep timer does not work for for My Passport SSD, My Passport Go, My Passport Pro, My Book Thunderbolt Duo, and My Book Studio II. |
- Select a drive.
- Click Settings.
- Click to Toggle OFF and ON Sleep Timer. (default=ON)
- Select a different time from the menu (default=30 minutes)
Timer Setting Details
| Default Timer Setting | ON |
| Default Time | 30 minutes |
| Time Intervals | 10, 15, 30, 24 and 90 minutes |
LED Settings
Turn Off and On the LED of a supported drive. (Default=On)
- Open WD Drive Utilities.
- Connect a supported drive with an LED to the computer.
- Select a drive.
- Click Settings.
- Click to Toggle OFF and ON the drive LED.
RAID Management
IMPORTANT:The RAID screen will not who unless the drive has two drives and supports RAID.
Check the drive status and change the RAID mode.
- RAID 0 - (default) max capacity and speed, no data protection
- RAID 1 - max data protection, half capacity
- JBOD - individual drives, max capacity, no data protection
Need more help?
Answer ID 659: RAID Levels Supported with Western Digital Products
Check RAID Status
Check the current RAID mode and status of a drive.
- Open WD Drive Utilities.
- Connect a RAID model drive to the computer.
Select the drive.
Click RAID Management.
Click RAID Status
RAID Types
- Stripe or RAID 0 (Striped) - (default) max capacity, speed, no fault tolerance
- Mirror or RAID 1 (Mirrored) -
- Individual Drives or JBOD (Individual Drives) -max capacity, no data protection
RAID Status
- Healthy
- Degraded
- Failed
- Cannot Access Data
- Data Loss Detected
- Not Configured
- Offline
- Online
- Rebuild Failed
- Rebuilding (x%)
- Unknown
Drive Status
- Failed - The drive has failed
- Online - Drive is online and available
- Rebuilding - The drive is being rebuilt
- Removed - The drive has been removed
- Standby - The drive is part of the RAID array but needs to be rebuilt
- Unknown - The drive has some other undetermined status
Drive #1 and Drive #2 Status
- Drive Not Supported - The drive model is not supported
- Empty - There is no drive installed, but none was expected
- Failed - The drive has failed
- ID Mismatch - Thedrive metadata information does not match its serial number
- Insufficient Capacity - The drive installed has insufficient capacity to be part of the mirrored RAID array
- Missing - The expected drive is not installed
- New Drive - The installed drive has not been configured
- Online - The drive is healthy and part of the RAID disk array
- Rebuilding - The drive is the target disk of the rebuild operation and that operation is still in progress
|
My Book Duo Drive Status Location Regardless of Drive Label Number
|
Change Drive Configuration
Changing the RAID mode reformats both drives.
|
Critical: The process is Data Destructive and cannot be undone. |
- Select RAID Management.
- Select Configuration.
- Select a RAID mode.
- Stripe - (default) max capacity performance (RAID 0), not fault tolerance
- Mirror - max data protection (RAID 1), but half the capacity
- Individual Drives (JBOD) - max capacity, no data protection
- Enter a Volume Name(s) for the drive.
Select HSF+ or exFAT File System Format.
JBOD requires two Volume Names and two Format slections.
Volumes should not have the same name. - Check the Box.
Click Configure.

Critical:
Do Not close the window until the RAID change is done.
- Click Close
About WD Drive Utilities
WD Drive Utilities features the ability to:- Run drive diagnostics
- Manage RAID configuration (For RAID supported models)
- Erase and format drive
- Set drive sleep timer (on supported drives)
- Register drive
Supported Drives
- Direct Attached Storage (DAS) Drives: My Book, My Book for Mac, My Book Duo, My Book Pro, WD Drive Plus, WD easystore Desktop, WD easystore Portable, My Passport works with USB-C, My Passport, My Passport for Mac, My Passport Ultra, My Passport Ultra for Mac, My Passport Ultra (USB-C), My Passport Ultra for Mac (USB-C),My Passport Ultra Metal, WD Elements SE, WD Backup Drive Desktop
- Drives not listed above are NOT supported.
- Attach a Supported WD Drive message.
Need more help?
Answer ID 6265: WD Security & WD Drive Utilities: Attach a Supported WD Drive
Supported Operating Systems
Windows
- Windows 11
- Windows 10 32-bit & 64-bit